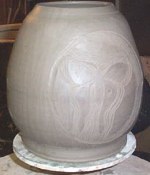
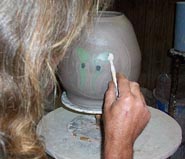
Hand Painting the clay body canvas
Using clay slips
What are clay slips?
Liquefied Clays
Uses:
1. Adheres objects to a pot. Attaching handles, decorations, etc.
this usage of clay slips is found on the Handling page.
2. Used in the mass production of molded pottery.
3. The stage at which raw clays can be blended.
4. When a glaze color is added,
it becomes to a potter as oils are to a painter.
5. Used to enhance glaze firing affects.
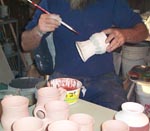
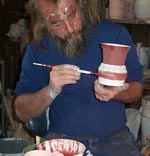
In this section we are concentrating on Painting your clay body with slips.
Basic Clay Slip Recipe: Clay slips are a small amount of clay mixed
with just enough water to form a batter like consistency.
To Prepare Colored Slips: Add a small amount of glaze color
to your already prepared clay slip base.
Stir, make sure the slip is free of lumps.
A slightly thicker batter like consistency is better.
Paint your piece using an artist's brush or sponge.
There are different types of clay slips
depending on which type of clay is used.
Porcelain clay slips are made with porcelain clay and water,
stoneware clay slips are made with stoneware clay and so on.
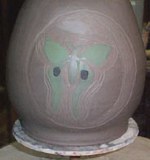
There are also color active slips Color active slips are applied when the artist
wants to enhance the glaze colors with special affects,
such as glaze color flashes.
Slips can take on the characteristics of the clays from which they are made.
This is due in part to where the clay was mined and the minerals and ores
that were present at the digging site.
This makes some slips indigenous to a particular geographic area
and more rare and some are even quite rare and very hard to acquire.
Once such type is Albany slip The clay supply for this slip is no longer mined commercially. Albany slip is available only sparsely.
At this point a better understanding of the what is happening to glazes
during firing becomes important. Clay slips can actually turn liquid during
firing based on the firing point of the particular clay type used.
For example: If you are using an earthenware
clay type to make you clay slip, consider this:
Earthenware has a lower melting point than porcelain
or even stoneware clay.
Earthenware clay is usually fired at lower firing temperatures, I
if you fire a piece painted with earthenware clay slip
at high firing temperatures,
the slip may liquify and flow glazing your pot.
Understanding how slips and glazes react under
various firing conditions is essential to a successful piece.
This is an in depth topic combined with kiln understanding
which is covered at depth on the glaze and firing pages.
If you are enjoying reading this blog,Share it on Facebook, Twitter, Buzz or Reddit.


 Begin with a ball of clay. Push your thumb into the center. Then pinch up the walls.
  Turn the piece as you pinch. This will help you to keep an even thickness in the walls of the piece.
  Gently pat the bottom on a flat surface to create a flat spot on the bottom of the piece.